Running PFLOTRAN-OGS
Running PFLOTRAN-OGS
You can run PFLOTRAN-OGS in three ways:
Follow the link of interest for further instruction.
Run on your Windows with Stratus
Assuming you have installed Stratus on your Windows machine, click on Run Pflotran Locally:
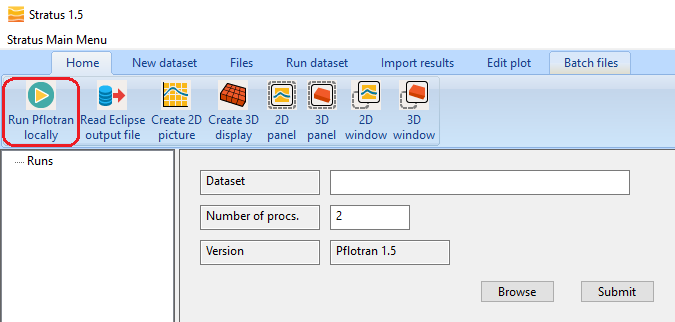
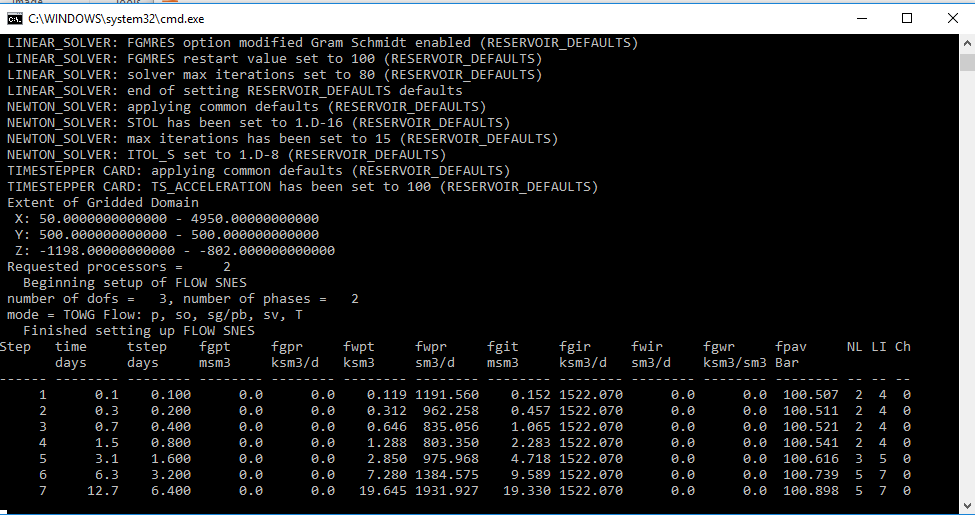
Browse the folder where you have saved all input files for the simulation (e.g. CCS_LT.in, ccs.grdecl, co2_dbase.dat and), and select the input deck (e.g. CCS_LT.in). Then type the number of CPU cores you want to use for the simulation (e.g. 2), then click submit. As the simulation is going, the screen output shows you the physical time progress, the time step size, the field gas injection rate and total (fgir, fgit), the field average pressure (fpav), etc.
After the run is concluded, please see the .log file in the run folder for the record of the screen output. Note this will be produced only when launching from Stratus - not from command line.
You can also run PFLOTRAN-OGS in Windows by command line. In order to do that, navigate into the Stratus installation folder, and copy the pft.bat macro file in the folder where you have saved the dataset you want to run. Unless you selected a preferred location for the installation of Stratus, you will find the macros in C:\ogs_solution\stratus_x.x\macros.
Then open a windows command prompt, navigate using the cd to the data folder, and type in the following command:
pft.bat CCS_LT.in 2
The instruction above will run the CCS_LT case on 2 cores.
Run on your Ubuntu by Command Line
Assuming you have followed the PFLOTRAN-OGS installation installation for ubuntu, you can open a terminal window, navigate to the folder where you have downloaded the input files of the tutorial you want to run (e.g. CCS_LT.in, ccs.grdecl, co2_dbase.dat ). Using the script file pft.sh, you can run a simulation using the following command:
./pft.sh CCS_LT.in 4
This will run the CCS_LT case on 4 cores. As the simulation progresses the screen output shows you the physical time progress, the time step size, the field gas injection rate and total (fgir, fgit), the field average pressure (fpav), etc.

Run on the Cloud using the OGS WebApp
Login into your OGS account.
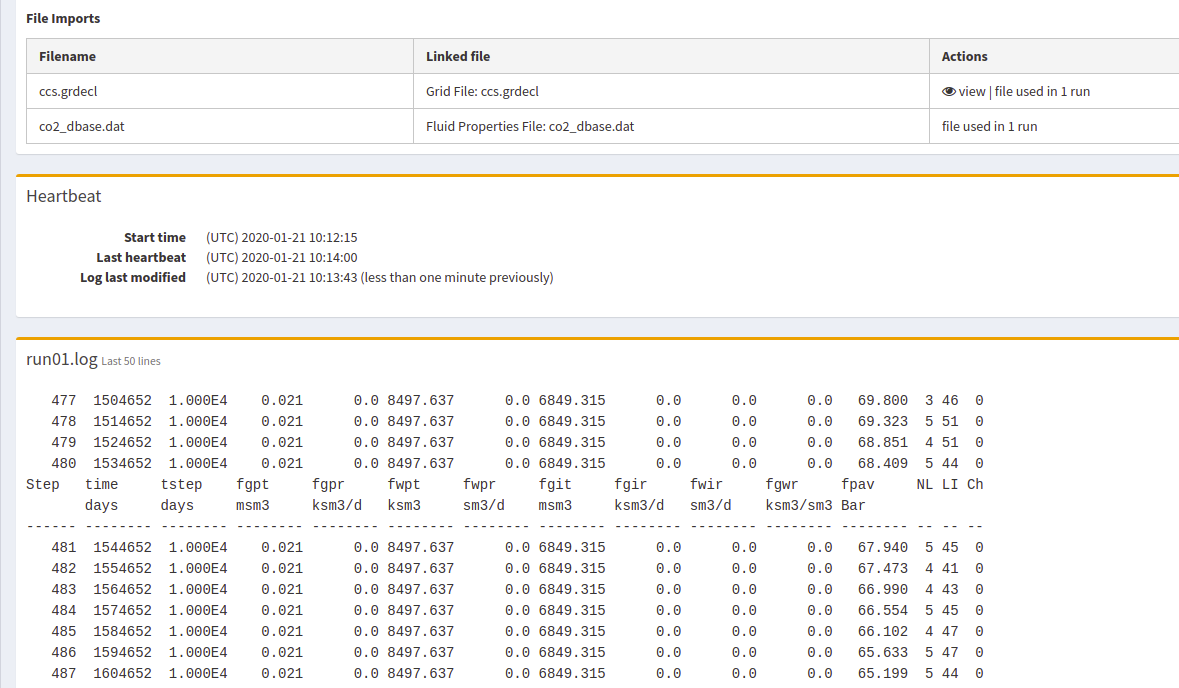
Create a Project, a Sub-Project and a Run, for example ‘co2_storage’, ‘CCS_LT‘, ‘run01’. Then upload the input deck: ‘CCS_LT.in’. The simulation control window should now display the following:
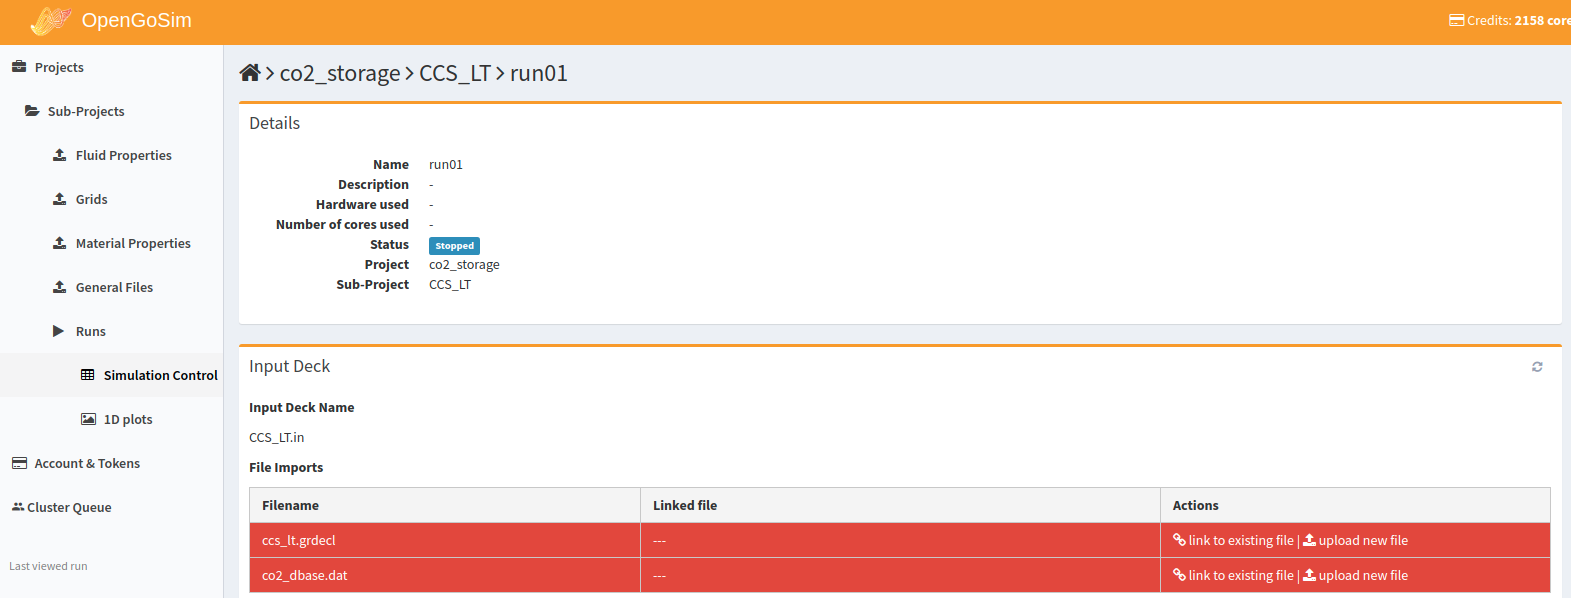
Under the ‘Actions’ menu of ‘File Imports’, click on ‘upload new file’ (see figure above), and upload the required external files (include files) , e.g. ccs.grdecl and co2_dbase.dat. You will be asked what type of files you are uploading (Grid, Fluid Properties, Material Properties, General), select the label you consider more appropriate, there is no rule to follow, these categories are required only to organised you data in your OGS cloud account. The red of the File Imports will turn white after a successful upload, indicating the simulation is ready for submission.
Start a test machine to run the problem. To do this click on the red computer icon on the top right corner.

After clicking the red computer icon, you should see the following pop-up window:

Select an 8-core machine, for a maximum duration of one hour (default), as all tutorial simulations will run in a few minutes. When the test machine is ready you will be notified by a pop-up window, this usually takes about 2-3 minutes. To launch the simulation, from the right side menu click on ‘Run on test machine’, the following window will pop up:
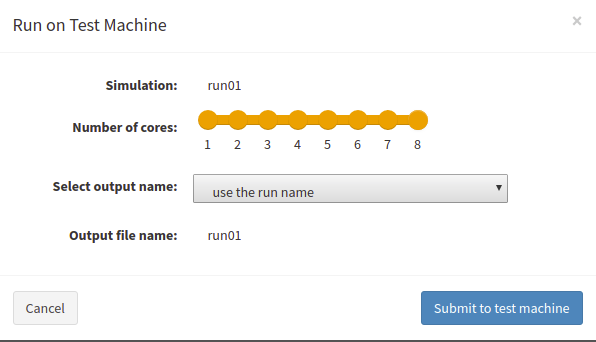
Select the required number of cores (you can leave the default 8 for all tutorials) and click on ‘Submit to test machine’.
When the simulation is going, scroll down to monitor simulation parameters such as time, time step, average pressure, etc.:
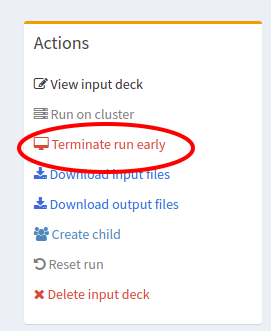
To stop the simulation before it completes, use the Terminate Run Earlier button in the right-side menu:
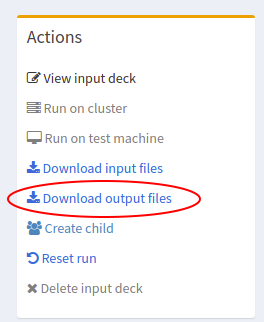
To download the results use the Download Output Files on the right-side menu:
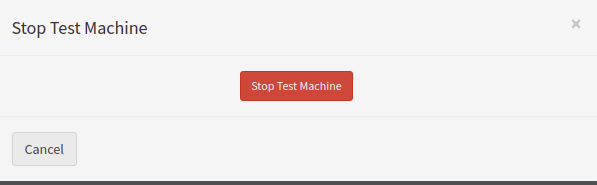
When the simulation is over, you will be notified by a pop-up window. If you don’t intend to do other simulations, click on the computer red icon on the top right corner, and click on ‘Stop Test Machine’:
Remember that, having selected one hour as maximum duration when turning the test machine on, this will be automatically shut down after one hour if you don’t take any action.
It is possible to run simulation requiring hundreds of CPU-cores, however this will require a cluster submission (Please refer to your OGS Cloud documentation).